
How To Install WordPress
Posted on: 5 December 2019![]() Posted By: YYDevelopment
Posted By: YYDevelopment
After you were able to understand what is WordPress it’s time to learn how to install WordPress on hosting. In the past the WordPress installation was complicated and demanded technical knowledge, luckily for us nowadays we can install WordPress within few minutes using almost any hosting and without any prior knowledge or experience.
There are two ways to install WordPress. The first one is by using a quick installation from the hosting and the second one is by manually install WordPress by uploading the installation files and by creating new database which is a bit more complicated. In this article we will teach you both ways so you will be able to choose the options that most convenient to you.
It is important to note that this guide is intended for those of you who want to install WordPress on your hosting. If you do not have a host for the site you should probably get one and get back.
For those of you who are not interested in purchasing hosting for your site, there is another option that allows you to create free WordPress website but this option restricts what you can do on the site and by using a free website you will end up with ads/banners on your websites.
One of the advantages WordPress has for being so popular is that almost every web hosting company offers the option to perform a quick installation. The manual WordPress installation option can be a little tricky at first and with the quick installation you can have your site ready to use within just few minutes.
For fast navigation click on the article part you want to view:
Install WordPress On Godaddy
![]()
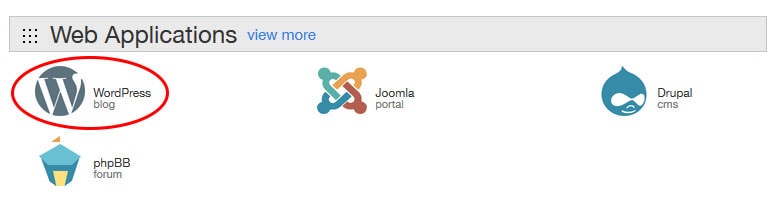
In this section we will start by teaching you how to install WordPress when your site hosted on Godaddy. In most cases, the hosting management interface is very similar, so you can follow this guide and perform the installation on other hostings as well. To perform the installation process go to your hosting management panel (cPanel), and under the “Web Applications label” click the button that says WordPress.
On the next page click the “Install This Application” button to start the WordPress installation.

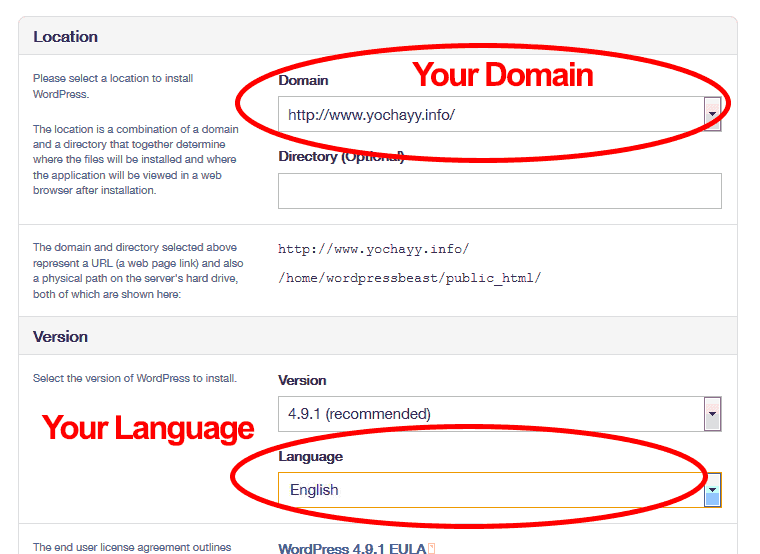
On the next window you will have the ability to change the WordPress installation settings. First you’ll have to choose the correct domain on which you want to install the site and then you’ll need to set up the WordPress installation language as well. If you want to install WordPress in different language than English simply choose the other language you want instead of English.
Under the Settings label you can set the username and password you want to login into your WordPress website. You can also configure the site name, email and website slogan.
After you finish filling the details, press the “Install” button to start the installation.

The WordPress installation process can take a few minutes and when it’s done you will be able to login into your new site. In order to connect to your WordPress admin panel you will need to enter the site domain name and add /wp-admin to the end of the domain URL.
For example: http://www.your-website.co.il/wp-admin
On the login page you will be asked to enter your username and password, and you can insert the login data that was defined in the installation.
As you can see the using the fast WordPress installation is very simple and does not require much knowledge, but despite the ease of installation building a professional website require the help of a professional. If you are interested in a professional WordPress website development services, we recommend using the help of website development company.
Install WordPress On HostGator
![]()
In this part of the tutorial we will show you how to install WordPress with quick setup when you are using Hostgetor hosting. The installation might be a bit different on other hosting companies but in most cases the process is similar and almost identical.
You can start the WordPress installation in Hostgator by going into your hosting cPanel (admin panel) and press on the “QuickInstall” option/button.
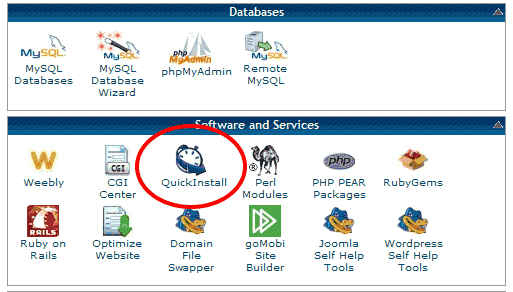
In the next window select the WordPress option from the top menu, and click on “Install WordPress” (as described in the image below):

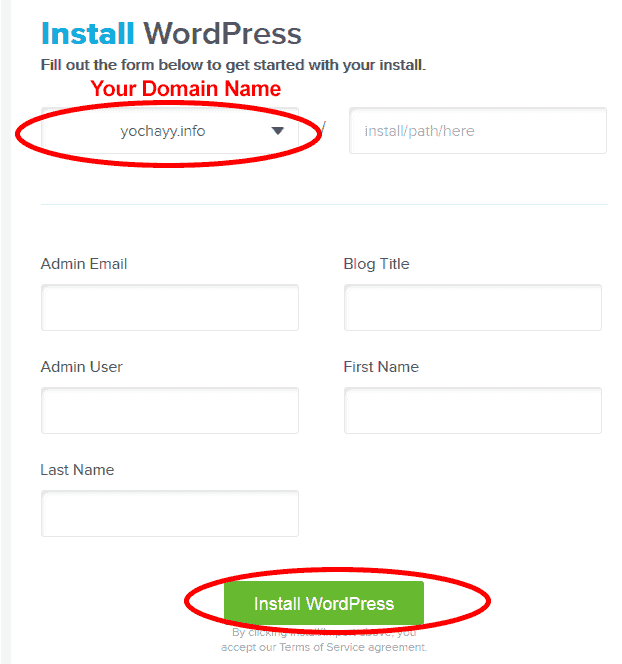
After choosing “Install WordPress” you will be forwarded into a new page were you will be able to fill some info related to your website. Make sure to select to correct domain if you have more than one website, insert the initial required data and click on the “Install WordPress” button.
From there the installation process will start and it might take few minutes to finish. At the end you will be moved into a new page and at the top of the page you’ll be notified that the installation is done. As soon as you see that the installation is completed click on the “View Credentials” button and you will get all your credentials data to the new site you created.
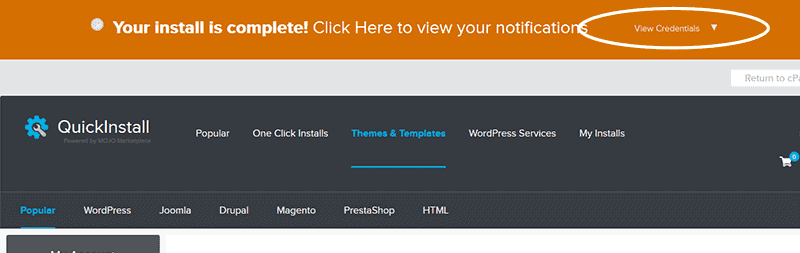
On the credentials page/window you will get the admin panel login page URL and using it you will be able to go into your new site and login into the WordPress admin panel.
Manual WordPress Installation – Works On All Hostings
![]()
Nowadays almost every respected hosting company offers quick WordPress installation. If your hosting provider does not have this option we recommend finding a different hosting.
For those of you who that don’t want to install WordPress using the quick installation and for those of you who just want to learn how to install WordPress manually continue reading this tutorial and we will teach you. It is also important to understand that unlike the fast installation the manual installation is a harder and it will take more time.
Step 1 – Download WordPress Installation
The first step in the manual WordPress installation is to download the latest WordPress version from the WordPress website. You can do that by clicking on the button below.
The file you will download from the site is going to be a ZIP file and you will need to upload the file to your hosting server in the next step.
Step 2 – Uploading WordPress Installation To The Hosting
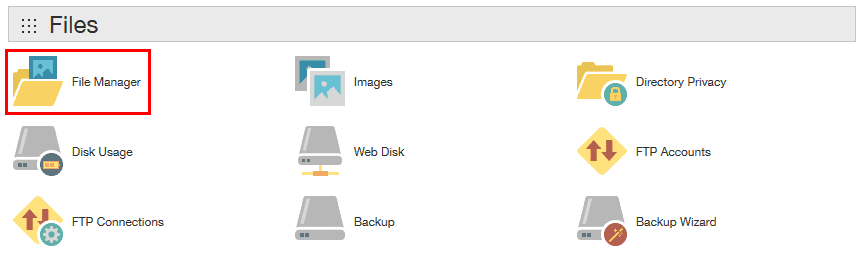
After you downloaded the WordPress installation ZIP file the next step will be to upload it into your hosting server. To upload the WordPress installation into your host, you will need to go into your hosting cPanel and click the “File Manager” button.
Afterwards you will get another popup window where you’ll need to press the “Go” button to continue.
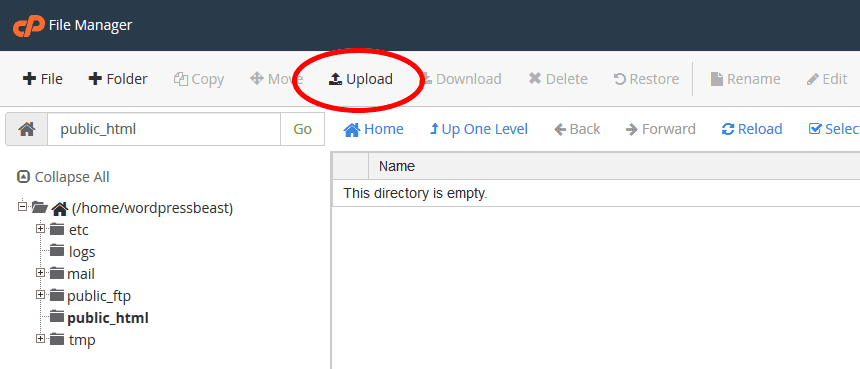
On the new window make sure to choose the correct folder path that controls your website/domain and click on the “Upload” button to upload the WordPress installation into your hosting. Normally the correct folder that displays your site is inside the public_html folder and under the domain name folder if you have more than one.
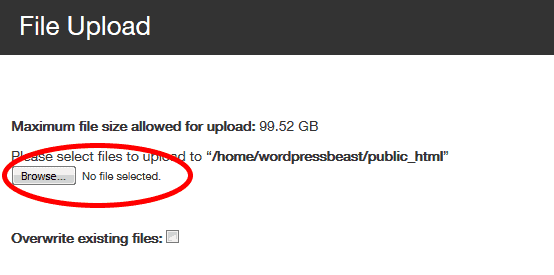
In the next window, click the “Browse” button and select the WordPress ZIP file from your computer.
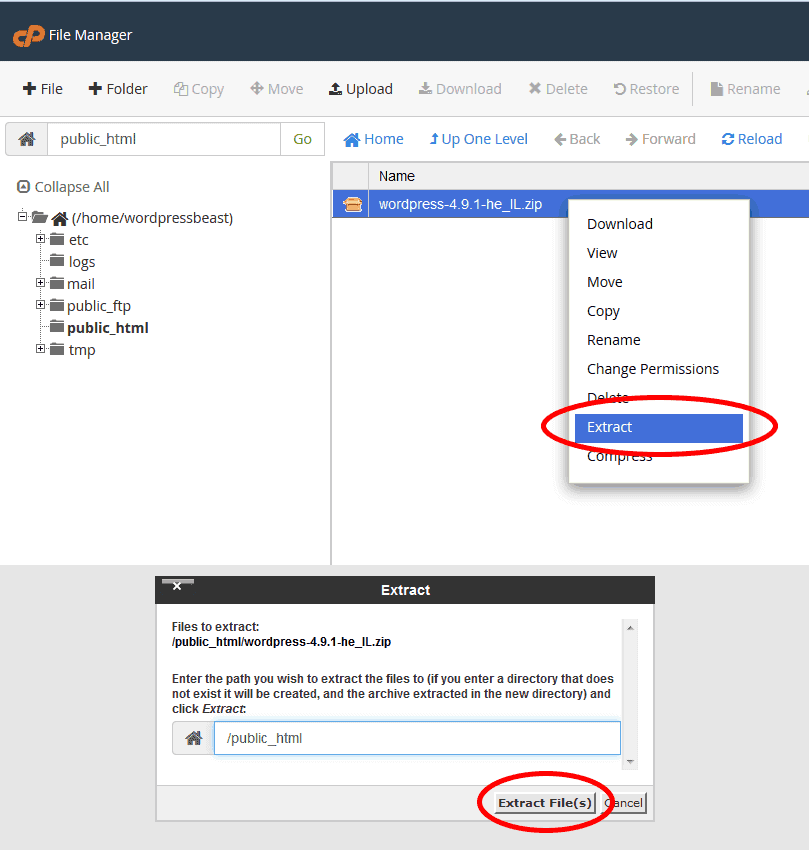
Once you have finished uploading the file, return to the “File Manger” page, press the right mouse button on the installation file and select the Extract option. In the next popup window click on the “Extract Files” button and wait until the new folder is created with the WordPress installation files.
Extracting the files will create new folder that will contain the WordPress installation files. You will also need transfer the files to the main domain folder and you can do that by going into the new folder, select all the files, press on the right button of the mouse and click on the “move” button.
In the next window remove the name of the folder that was created and move the files into the main domain or folder where you want your site to load from.

Now all that is left to do is remove the ZIP file and the empty folder that was created after the files were transferred.
[output-blog-contact-form full_text=”” reason=”” title=””]
Step 3 – Creating WordPress Database
The WordPress installation requires creating a new database on your hosting for the site. When we create a new database we will also need to create user and provide the user permissions to make change for the database/site.
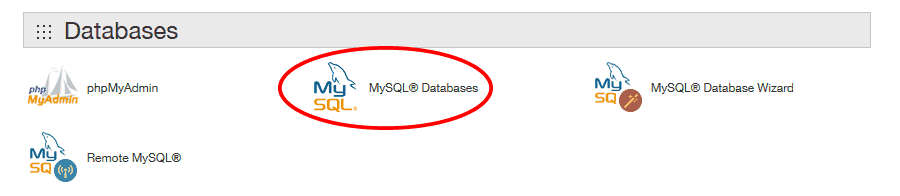
In order to create a new database return to the hosting cPanel and click on the “MySQL Database” button.
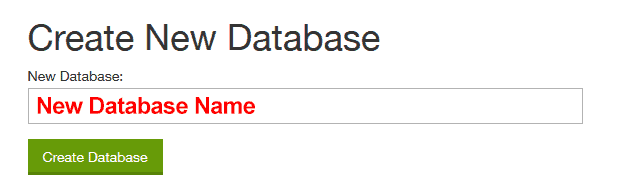
The first step will be to create a new database. Under the “Create New Database” headline insert the database name you want to use and click “Create Database” button.
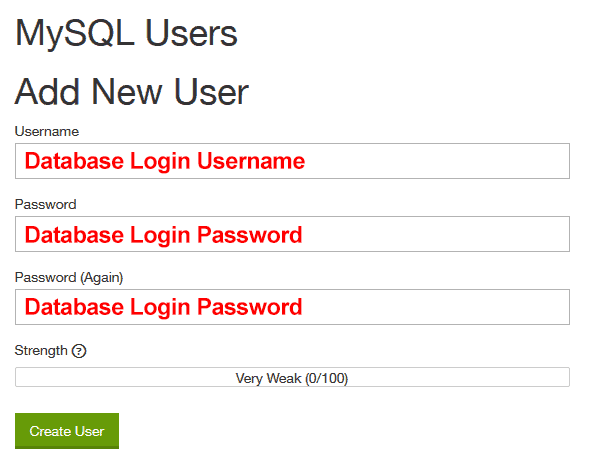
The next step will be to create a username and password. In the same page under the title of “Add New User” enter the username and password that you want to use and click on the “Create User” button.
All that is left to do now is to give permissions to the user on the new database that was created. Under the title “Add User To Database” select the username and the database that you created and click on the “Add” button.

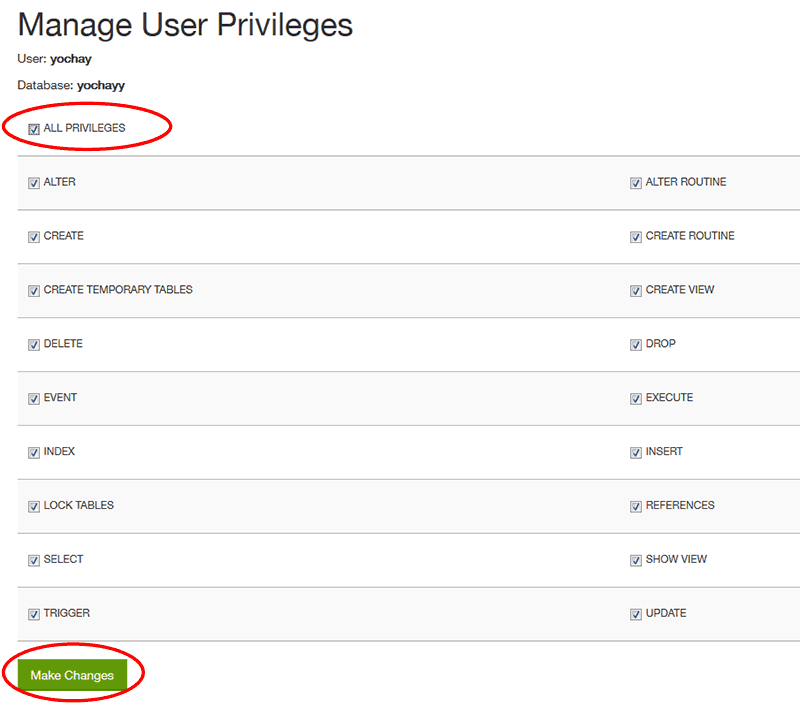
In order to provide privileges to user in the database check all the options in the window (You can also click on “ALL PRIVILEGES”) and then click on the “Make Changes” button.
Step 4 – Starting WordPress Installation
The last step is to set the database name, username and password into the WordPress installation panel.
To finish the installation process go into the live URL path were you uploaded WordPress installation files (normally your site domain) and on the website you will be able to see the WordPress installation screen and there you can press the “Let’s go!” button to start.

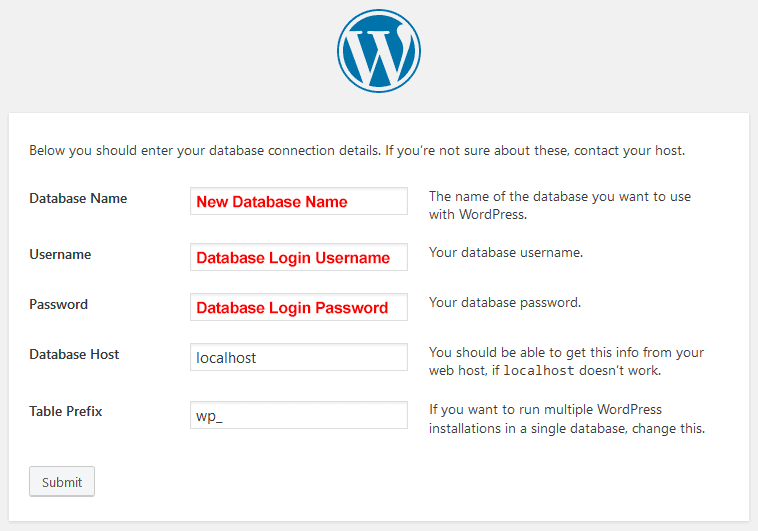
In the next window you will need to insert the name of the database you created and also the username & password that you used to give privileges to the database in the last step.
If you get an error that means that you are probably using incorrect info and you will need to repeat step 3 again and create new database and new username and password. If you will be able to get into the next window (in the image below) that mean you were able to do everything right.
The last part of the WordPress setup process is to insert your site details and to create new username and password that you will be able to login in with into the WordPress admin panel.
When you finish inserting all the data you will be transferred into the WordPress login page and you will be able to login into the admin panel with the user and password you have just set.

Choosing For WordPress Installation
As you’ve probably seen in this tutorial the WordPress installation is not complicated and with the help of this tutorial we are sure that you will be able to easily do it yourself next time. As long as you don’t need to manually install WordPress like we use to do in the Middle Ages the setup process should be really simple and fast, even without any prior technical knowledge.
If you are using shared hosting then there is no reason that you will not have the fast WordPress installation option. Most hosting companies nowadays have the “quick install” option and if your hosting company doesn’t we strongly recommend that you find a different hosting.
The WordPress installation is just the first step in the process but creating a professional website is a different story. If you are looking for a professional wordpress website feel free to contact us and we will be happy to help.
If you need more help with WordPress feel free to check more of our WordPress tutorials to learn how to use it better or leave a comment below if you have any questions.
![]()
Do you have any questions or something to add, share it with us in comments below?
We are always happy to learn new things and to help website viewers. If you have any questions or anything to add, we will be happy to hear from you.